Tutorial 2: - Import XR Data as Mandrel
 Cadfil Help contents
  Cadfil.com Home
In this example we take a set of XR data (defining the radius of a mandrel at various 'X values' along it), and we import this into the Cadfil Mandrel editor by making a .mnd mandrel file.
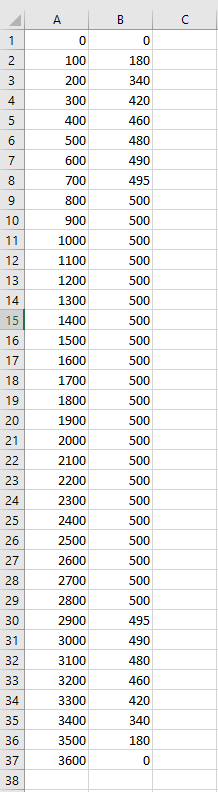
The set of data we will be using for this is shown in the spreadsheet picture below. The first column is a list of X positions, the second column shows what the radius is at the x position stated.
Creating the .mnd file
1] The first step is to arrange the data so with both the X and R values side by side in columns as shown in the picture above. Where there is long sections with constant radius, such as from 800 to 2800, where the radius is a constant of 500, it may help to remove all the data points between 800 and 2800 as they have no impact on the mandrel shape, however they are left in for this example.
2] Now that the XR data is in the correct format, the next step is to open a blank text (.txt) file.
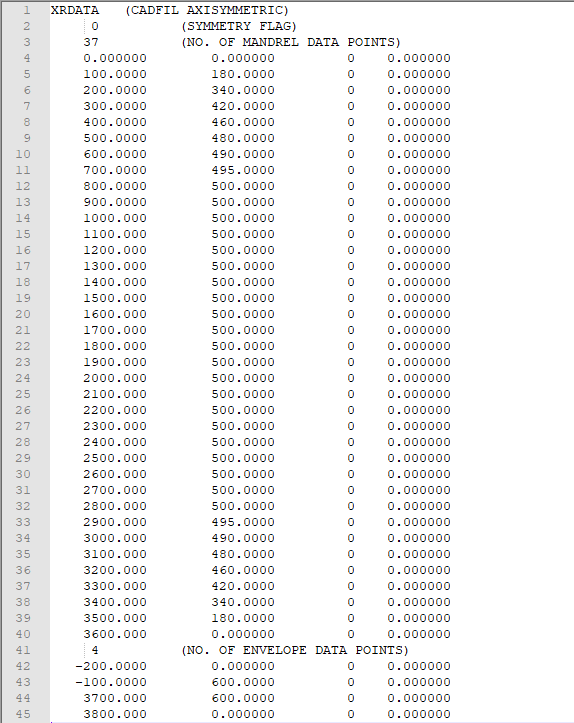
3] The picture below shows the contents required for the text file to be read by the Cadfil Mandrel editor. This picture is explained in the subsequent instructions
4] The first line of the text file must read "XRDATA" for Cadfil to identify it as a Mandrel file
5] The second line in the text file is the symmetry flag. This can be either 0 or 1. If the mandrel is symmetrical (the x- and x+ endcap are identical), it is possible to give only the XR data for the first half of the mandrel. As the mandrel is symmetrical, Cadfil will be able to create the rest of the mandrel automatically. In this case, the symmetry flag would read 1. In this example however, although the mandrel is symmetrical, my data specifies the entire mandrel, not half the mandrel, therefore I will set the symmetry flag as 0.
6] Line 3 specifies the number of data points. In this case I have 37 data points as can be seen on the spreadsheet.
7] From line 4 and onwards, the text document contains the data points which can be taken directly from the spreadsheet by copying the relevant cells in the 2 columns simultaneously and pasting directly into the text document.
8] In this example an envelope is not specified, Cadfil will create a default envelope. If a specified envelope is required, read step 9. If the default envelope is sufficient, skip to step 10.
9] Specifying an envelope is very similar to specifying the XR data of the mandrel. On the line immediately after the mandrel data, input the number of data points of the envelope, exactly as you did for the mandrel in step 6. After this, on the subsequent lines, input the XR data for the envelope in the same format as was done in step 7. The mandrel must be contained within the boundaries of the envelope.
10] In order for Cadfil to read the file, the file extension must be changed from .txt to .mnd.
11] Select the 'Mandrel Edit' option in Cadfil and open the .mnd file that has been created.
12] If an envelope has not been specified, Cadfil will ask to create a default envelop at this point, press 'OK'.
13] The mandrel and envelope will be displayed on the screen as shown below.
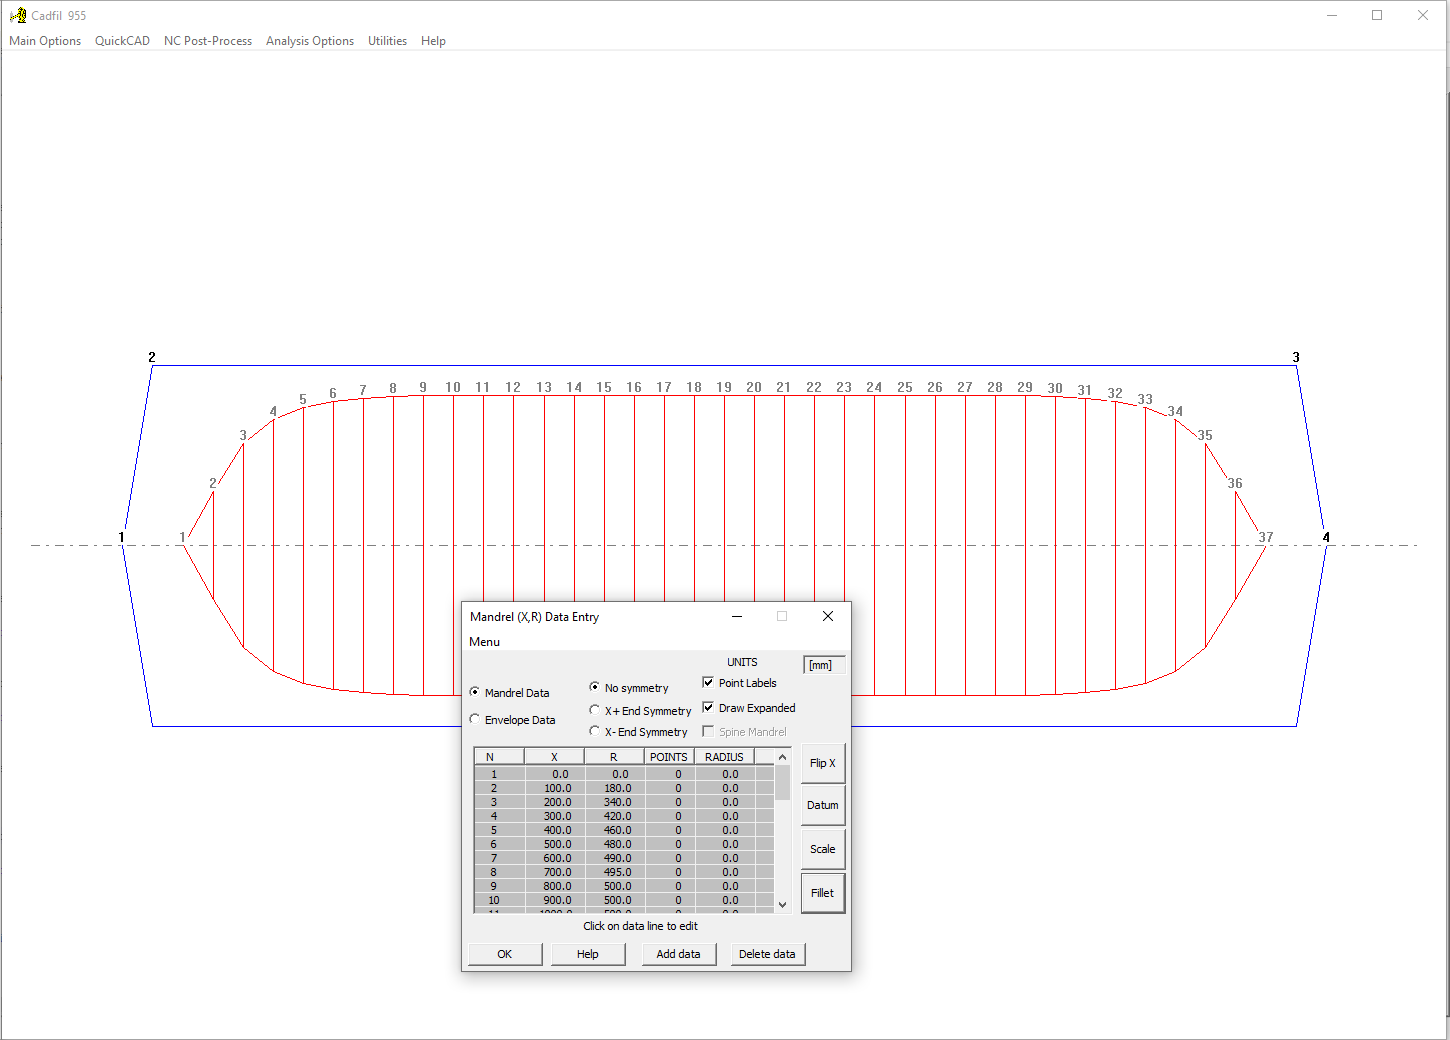
14] If any further changes to the mandrel are required, such as filleting or inserting a fit radius, this can be done now. For more information see the Editing of Mandrel and Envelope X, R Data page.
15] Once the edits to the mandrel are complete, press 'OK'. The mandrel will save in as a full Cadfil mandrel format with envelope as shown below.