Cadfil Installation
 Cadfil Help contents
  Cadfil.com Home
Cadfil Run Time Licence Error Codes
Cadfil installing a new Licence Error Codes
Cadfil Network Licence Server Installation
Cadfil Network Licence Server Monitoring
Cadfil Network Licence Failure or Timeout
Adding a Second Cadfil Network Licence to a DK2 Datakey
To install Cadfil correctly the installer must have administrator rights on the PC. Cadfil requires a USB datakey (dongle or software protection device) to enable full use. The first step is to run the Cadfil installer, this copies files to the Cadfil install folder and creates start menu and desktop shortcuts. The default installation folder is C:\Cadfil\Cadfil9xx. The system drive (whatever letter that may be) is the default drive. Please note that IF this version of Cadfil is ALREADY installed then the previous install folder is selected and is used with any asking or giving any choice, if this is not what you want you will first need to run the Cadfil uninstaller. Further installers can get run for the USB datakey drivers chosen. You can install multiple different versions of Cadfil as they do not affect each other in any way as different locations and shortcuts are created for each version.
Cadfil uses a security device called a Datakey. This is a DK3 (Blue USB) device. Cadfil can also have DK2 USB devices which look exactly the same but are Green in colour and have DK2 printed on the label.

Main Cadfil Installation
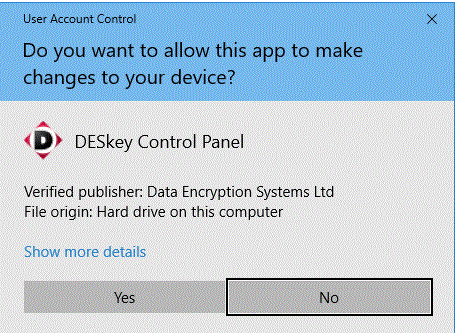
The Cadfil Installer would typically have a name like Install_Cadfil961.exe indicating this was version 9 sub-version 61 (V9.61). Cadfil installers can be found on the download page at www.cadfil.com/updates.html. To install Cadfil correctly the installer must have administrator rights. Typically on recent windows versions you will first get the UAC prompt as below.
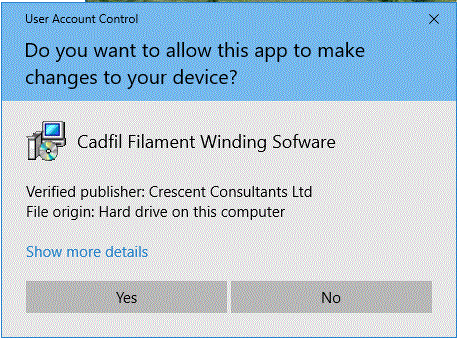
If you click the "Show more details" link on the above dialog it should show a valid digital Signature signed by "Valid Publisher : Crescent Consultants Ltd". The initial steps of the installation are shown in the pictures below.
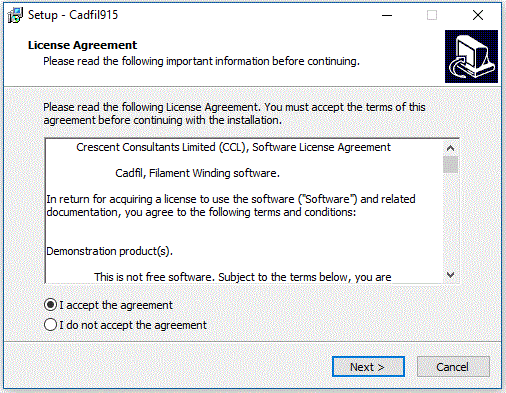
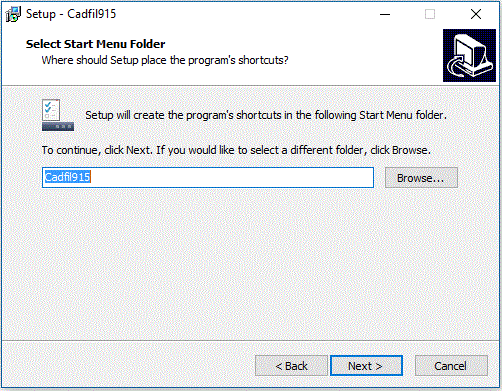
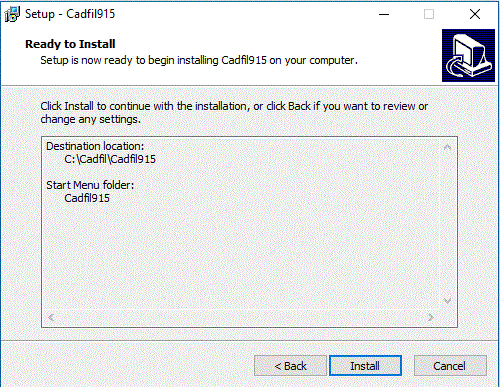
As can be seen above Cadfil by default installs into the C:\Cadfil\Cadfilxxx. where xxx is the version e.g. 961. It is possible if the same version of Cadfil is already installed the installer will skip the first two screens above and use the locations of the previous install. It is not recommended to change the defaults. Cadfil reads (and sometime writes) configuration data to the install folder and the normal windows "Program Files" location has restricted user access. You can install multiple different versions of Cadfil as they do not affect each other in any way as different locations and shortcuts are created for each version.
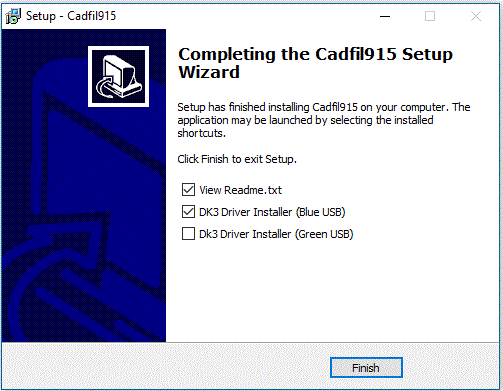
The last step of the main install is shown above. There 3 option boxes, one to view the "READ ME" file, and two for datakey drivers. If you already have cadfil running on the PC and are just installing a newer version you can uncheck (remove the tick) from the DK2 or DK3 install boxes as the current working drivers will be OK. If it is a new install select either DK2 or DK3, depending on if you have a green or blue USB datakey. There is no problem installing the drivers again if they are already installed, the installer will replace older driver files and skip installing the same files again or indeed skip overwriting more recent versions that may be be installed. In the event that you have both DK2 and DK3 datakeys you can install both types.
If you have a Cadfil network licence (only available from Version 9.15 and only if a network licence has been specifically purchased) then select DK2, as the DK2 can be later configured as a network device as described in a later section.
Datakey Driver Installation
There are two different installers that can be called by the Cadfil installer, the DK3 and the DK2 installers. When Cadfil is installed these are copied to the C:\cadfil\cadfilxxx folder (xxx = version e.g.961). At the time of writing these are called, dk3wn3264_3.15.0.17.exe and dk2win3264_8.19.7.exe though the version numbers may change for future releases. The Cadfil installer create shortcuts to these installers under the Cadfilxxx entry on the start menu and also has the option to run these directly.
DK3 (Blue) Datakey Driver Installation
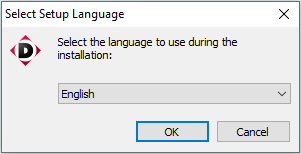
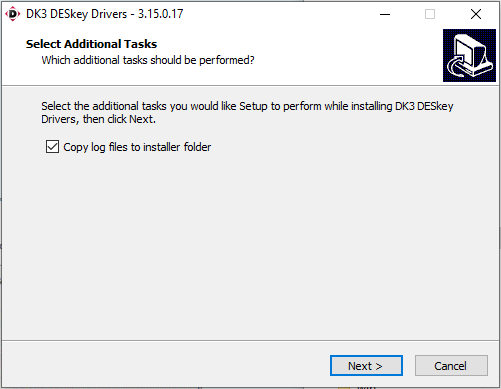
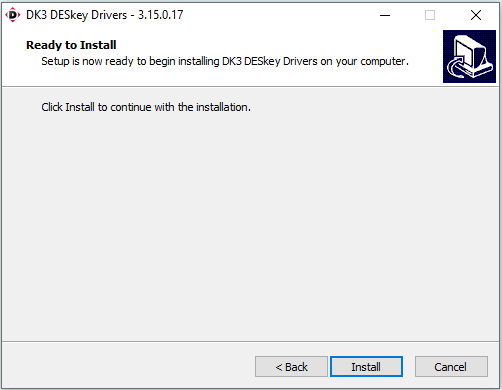
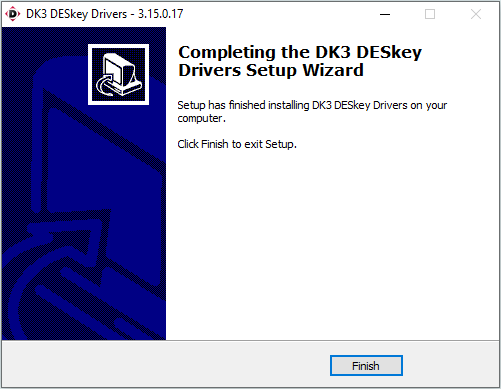
At this point after the above steps the DK3 should be installed correctly and if you plug in a DK3 to a USB port windows should recognise it. The very first time the USB is plugged into a particular port there may be a short delay and windows may give some message about configuring/installing the USB. If for any reason you think the datakey drivers are not installed correctly then please read the section on checking the datakey driver installation.
DK2 (Green) Datakey Driver Installation

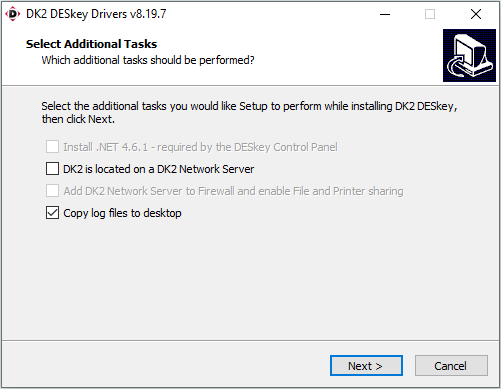
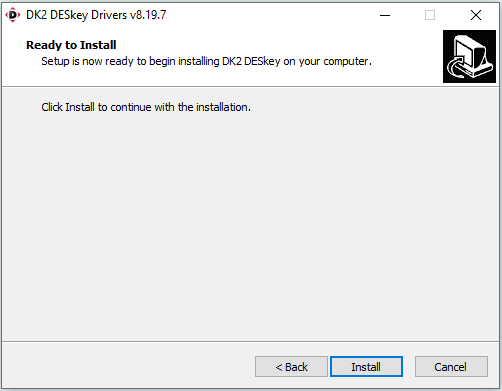
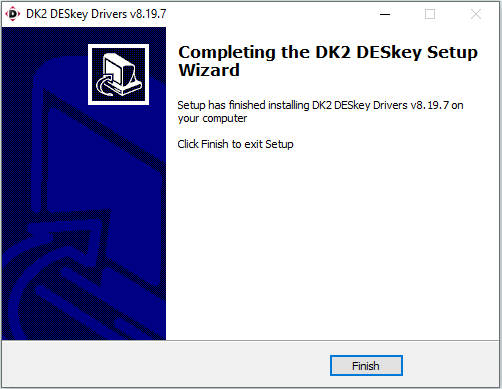
In the Above pictures the local install 'Copy log files to desktop' option is selected, this is the normal option. The 'Server' option is only selected with the Cadfil had a network licence option where the DK2 USB device will be attached to a remote licence server machine. The network licence is not a default option and is only available if that option has been purchased. This setting can be modified after installation using the DESnet control panel which can be found in the section Checking driver Installation
Checking driver Installation
If you think the drivers are not loaded, or example you have have had this message from trying to run Cadfil. There is a control panel entry that gives the status of the DK3 and/or DK3 drivers. In windows 10 the "classic" windows control view panel seems to have been removed. A couple of ways to get to the settings is [Window] + {r] (press on hold the windows key and then R key). The "Run" dialog box should appear, type "DESKEY64.CPL" (not case sensitive) and click OK. A second way is just to type "DESKEY64.CPL" in the Cortana "Type here to Search box" normally in the bottom left of the start menu. If your windows version is an older 32 bit version You would need to type "DESKEY32.CPL. "
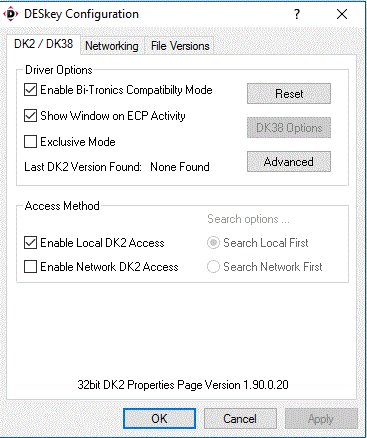
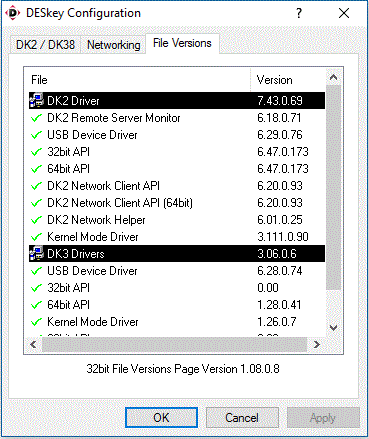
The above screen is shown if DK2 is installed as there are three 'tabs', Dk2, Networking and File Version. If only DK3 is installed there will only be the File Versions tab like below which will list the driver versions that are installed. The presence of the Deskey Control panel is indicative of the drivers being installed. In the Picture above there is an option for local and/or network access to the DK2. Local is where the DK2 is attached to local PC, for network the DK2 is attached to a remote network server. If both are ticked the search option becomes active, so Cadfil will look for a local DK2 and if that fails looks for a network DK2 (or visa versa). The network option should not be picked UNLESS you have purchased a network licensed version of Cadfil as it will not work. The next section below explains the networking tab.
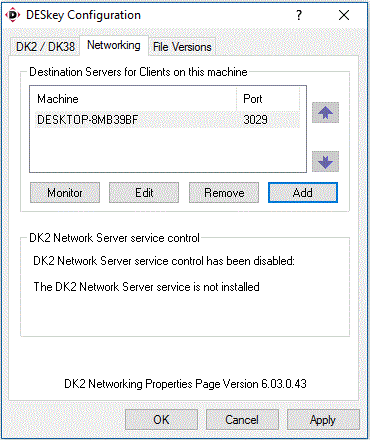
The networking tab is only relevant for network licence versions of Cadfil. You should pick "add" and browse the network for the name of the server where the DK2 and DK2 server software is installed. The port is they network port that is used on the server the default port is 3029 but this can be overridden by another value if necessary. It is also possible to have more than one licence server.
Apply a licence file
You should have been sent (usually by email) a small file, usually called ‘lic.dat’. This is required when you run Cadfil for the first time after an install. Place this file in a convenient location on the PC, for example on the desktop.
You can now run Cadfil my clicking the Cadfil shortcut on the desktop or in the start menu. You may find that most of the menu options are greyed out and cannot be used. A security error message may be given and you could be directed to this help file if you chose to be.
To apply the licence you need to go to the utilities menu and select the Apply New Licence file option. You will then need to browse in the file open box to find the licence file you saved earlier. Having read the licence file you can then see the Cadfil the Message ‘Licence Update Successful’ in the Cadfil Text window (you may need to scroll down this window to read the messages). If you get an error please note the error number and contact CCL. It may be that you need an updated licence file. Typically licence files must be applied to the DK3 within 9 days of the licence being generated, after that time it cannot be used 9an error is given) and a new licence file is needed.
For a video example of how to apply the licence file, please see the Cadfil example video on license installation.
Security error messages will be of the format ‘ Security failure, code xxx. View Help? ’. Error codes meanings are shown below.
It is suggested that you:
- Check the Datakey is plugged into the PC and try to run Cadfil again. After plugging in a key wait a few seconds for windows to find it.
- Check driver installation, see Checking driver Installation
- Re-install the driver files if necessary and try again.
- Contact CCL at sales@cadfil.com (or your supplier) quoting the serial number on the datakey.
For other codes you may just need to apply the latest licence file as described above. If the error persists please contact CCL. Contact details are at the start of this help file and can also be found on the About Cadfil option.
Cadfil Run Time Licence error Codes
- -1/2 No Datakey driver install found
- -5,-16,-17 Corrupt Datakey data
- -6,-7,-8,-18 Licence expired
- -9 Datakey found but not recognised (not initialised by Cadfil) or networked DK2 option not licensed
- -10,-11,-13,-14,-15 Only for DK12 parallel key (DK12 is now obsolete)
- -12 Cadfil version number too high for licence data version
Cadfil installing a new licence error codes
The error codes when installing a new licence file are different meanings,these are:
- -1 Lic.dat file selected is not found
- -2 Error opening lic.dat file
- -3 Error reading lic.dat file
- -19 Lic.dat file is corrupt
- -5, -6 License file is time expired
- -7 DK3 found but not recognised
- -8 Wrong DK3 for licence file/wrong licence file for DK3
- -9,-11,-12 DK12 error codes
Cadfil Network Licence Server Installation
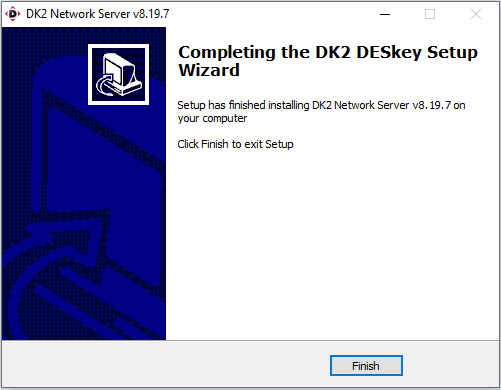
The DK2 (Green USB) can be configured on a network licence server if this option is supplied. The server installer uses the same DK2 driver installer as before, but for the server option an additional file (DNSvPm32.dll) is required in the Cadfil install folder, C:\Cadfil\Cadfil9xx. This file is available to download on request if the option is applicable. The installation process is simple and is shown in the following pictures.

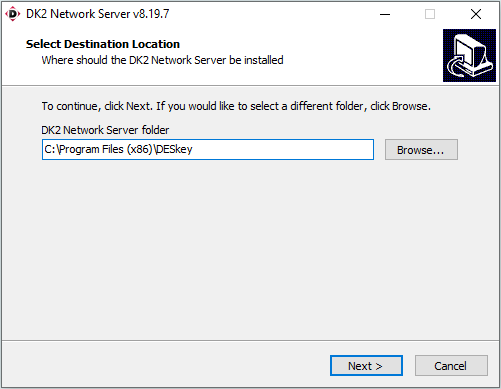
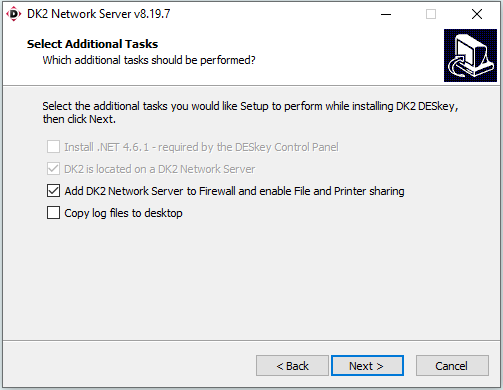
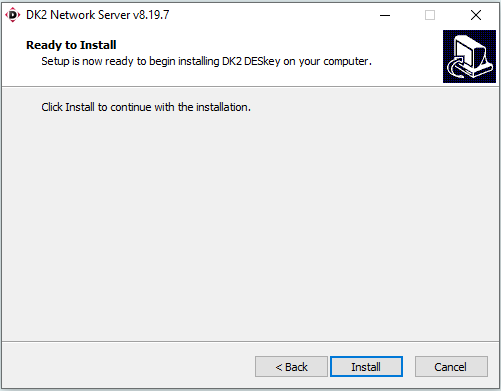
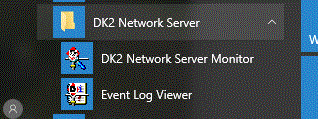
After the server installation you should have the two start menu items "DK2 Network Server Monitor" and "Event log viewer"
as can been seen in the image below.
The Event log viewer (shown below) shows all activity on the server such as the access via Cadfil "client" systems.
In the log below you can see the report that the server process has started and that it has found a DK2 device, both of
which are signs of good health! A description of the "DK2 Network Server Monitor" can be found in a following section.
By default the Licence server and clients communicate on network port 3029. This port needs to be open for access on the
client and server machines and on any routers, firewalls etc. that sit between client and server. This is normally a task for
an experienced network administrator. If you need to change the port on the server (you will also need to change on clients
to match) you can do this via the Deskey Control panel., the link given shows how to access
the Deskey Control panel. The network tab on the control panel is different if you are running on the server.
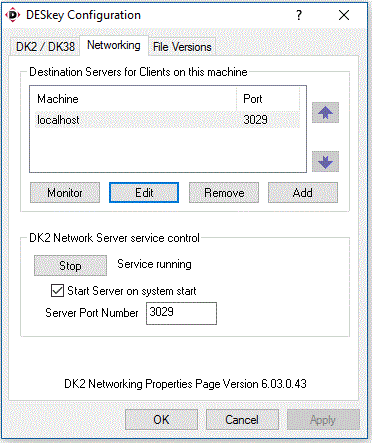
As you can see in the image below there is an area with "DK2 Network Server service control". In this area you can change
the port number and stop and start the licence server process. You can see these changes in the event log viewer. You can also
note that you can also run Cadfil clients on the server and access the DK2 network process via "localhost". You can also note "Monitoring"
button which opens the Network Licence Server Monitoring dialog, this is described in the following section.
The Network Licence Server Monitoring dialog allows you to see the current Cadfil licence status, that is how many
licences are available and how many are in use and who is using those licences. The Monitor dialog can be started in two ways,
via the Monitor button on the Networking tab of the Deskey Control panel or via "DK2 Network Server Monitor" on the Windows Start menu.
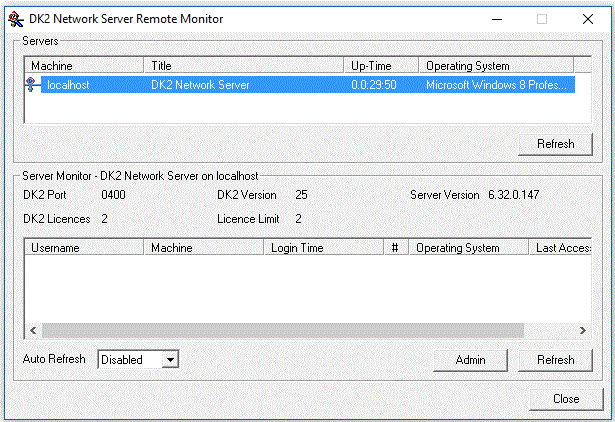
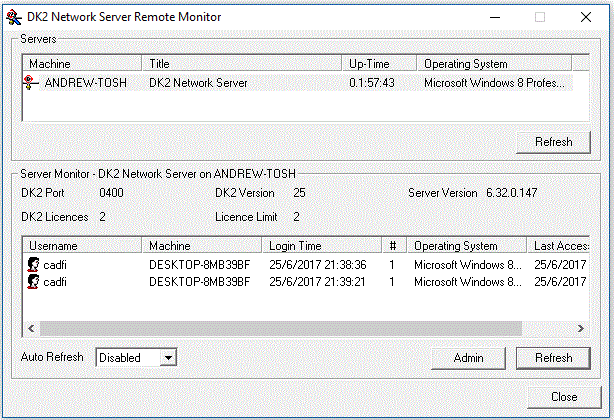
An image of the dialog is shown below, the first image shows it run from this server. In this example it shows there are 2 licences
available and none are being used. In the second image this is from a client machine looking at a remote server. It shows two
licences both of which are in use. You will note that both are issued from the same PC as the licences are "per process" not "per machine"
so if you have two copies of Cadfil, running that will use two licences even if both those Cadfils are running on the same machine.
There is no specific licence error when all the licences on the server are in use and an additional licence is requested.
The error will be "datakey not found" as the request to access the datakey via the server is denied. If you cannot get a licence
you can run the Network Licence Server Monitoring options described in the previous section. The two likely causes will be that
either that no licence server is listed or all the licences are being used. The first item may be that the licence server is down,
the licence service is stopped on that machine or there is a problem with the network. In the case where all licences are in use
you can either wait for one to become free, beat a colleague with a large stick until they agree to release the licence or go and see
the boss and get him to buy more Cadfil licences from those nice Cadfil people. It is also possible that there may be "stale" licences
where the server believes a licence is still being used when in fact it isn't.
When Cadfil exits normally the licence that is being used is released back to the server. If the PC crashes, Cadfil crashes or the
network as gone down this licence release process will not happen so the server will still think that that licence is being used and
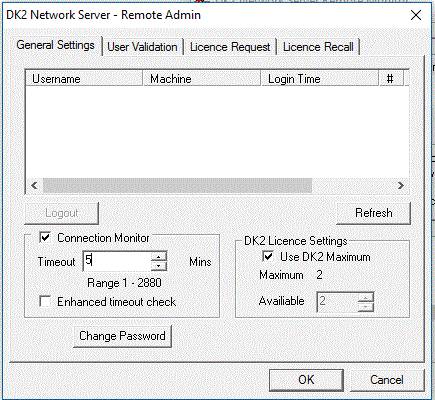
hence a stale licence licence can be created. The Network Licence Server Monitoring dialog described in the previous section has an "Admin"
button available (i.e. not greyed out) when it is run on the licence server. When this is pressed a password is requested (a default password -
available on request - is initially set). After successfully entering the password the dialog in the image below is shown.
The connection monitor option is set at a default of 30 minutes but can take values from 1 - 2880 minutes (2 days). This
means that after 30 minutes of no activity between a client and the server the licence is released at the server. A drawback of a
long timeout is that you might have to wait that long to be able to get a stale licence back. Setting
a short time (e.g. 1 minute) can also be a problem. Every time you select a menu option in Cadfil, Cadfil messages the licence server to say
it it still running. If however if Cadfil is inactive (the phone rang for example) the licence may timeout and be released back to the server.
As soon as you resume work the licence will be obtained again. This is OK unless someone else made use of the licence whilst you were on
the phone in which case you will get a beep and the 'Datakey Unplugged' message until such a time as a licence is available or you exit Cadfil.
A time of 5 minutes is probably a good compromise. Stopping and starting the licence server process will also clear stale licences.
Enabling the "enhanced timeout check" tick box is advisable, this sets a heartbeat with the software reporting to the server at a frequency greater than the timeout frequency to
prevent the software from timing out due to user inactivity.
The beep and 'Datakey Unplugged' message can also be given if the licence server or network goes down after you can successfully obtained a licence.
When the server or network is restored the Cadfil session can be continued. If you are in a command you should be able to continue (e.g. save) until the point
that you need to select a menu command.
If you have purchased a second licence to apply to a current Cadfil DK2 datakey, which you already own, there is a separate page
discussing the steps involved with this process

Cadfil Network Licence Server Monitoring
Cadfil Network Licence Failure or Timeout
Adding a Second Cadfil Network Licence to a DK2 Datakey